How to Fix Soggy Wood-Fired Pizza + 12 Other Common Problems
After hundreds of pizzas and countless discussions with other home cooks facing the same problems, we've mapped out exactly what causes these issues and how to fix them.
If you're struggling with soggy pizza, you're not alone. Thousands of home cooks run into this exact problem. And it's almost never just one thing—it's usually a combination of dough handling, toppings moisture, and temperature management all conspiring against you.
12 Common Wood Fired Pizza Problems
- Problem #1: Soggy Crust
- Problem #2: Burnt Bottom/Undercooked Top
- Problem #3: Uneven Cooking
- Problem #4: Dough Won't Launch
- Problem #5: Toppings Not Cooking
- Problem #6: No Leopard Spotting
- Problem #7: Dough Shrinks Back When Stretching
- Problem #8: White/Underbaked Crust
- Problem #9: Huge Bubbles/Blisters
- Problem #10: Raw/Doughy Center
- Problem #11: Creosote/Bitter Taste
- Problem #12: Temperature Won't Hold
Problem #1: Soggy Crust (The #1 Beginner Complaint)
Here are the top reasons why your wood fire pizza is soggy:
1. Too Many Wet Toppings
If you're piling on fresh mozzarella, heavy sauce, sautéed mushrooms, spinach, and cheese all at once, you've basically created a moisture barrier on top of your dough. Here's what happens:
- Your sauce seeps through the dough, softening it
- Fresh cheese releases whey (liquid) as it melts
- Multiple topping layers trap steam underneath
- The bottom dough sits in that moisture instead of crisping
Most people think Italian pizza is about loading toppings. It's actually the opposite. Traditional Neapolitan pizza uses 3-4 toppings maximum, applied sparingly.
2. Cold Toppings
Ingredients straight from the fridge absorb heat energy that should be going toward cooking your crust. Meanwhile, they're releasing moisture as they warm up.
3. The Peel Timing Problem
This is the one everyone misses: if you build your pizza on the peel and then wait 60 seconds before launching, the sauce and cheese have already started soaking through the dough. By the time it hits the stone, the bottom is compromised—soft instead of ready to crust.
How to Fix It Your Wood Fire Pizza’s Soggy Crust:
Step 1: Reduce Your Toppings
Start with 3-5 ingredients maximum. This isn't a thick-crust situation. Think:
- San Marzano tomato sauce (thin layer, not heavy)
- Fresh mozzarella (scattered, not loaded)
- 1-2 additional toppings (basil, olive oil, or one other vegetable)
That's it. That's a proper pizza.
Step 2: Pre-Cook Your Vegetables
Raw vegetables release massive amounts of moisture as they cook. Instead, prepare them ahead:
- Mushrooms: Sauté until moisture is driven out, then cool
- Onions: Caramelize slowly (30+ minutes)
- Spinach/greens: Wilt and squeeze dry
-
Bell peppers: Roast or sauté until soft
This takes 2 minutes of cooking time off your oven and prevents moisture from ruining your pizza.
Step 3: Layer Strategically
Order matters:
- Light sauce base (thin layer—you should still see the dough underneath)
- Cheese (creates a moisture-blocking barrier for the dough below)
- Other toppings (these sit on top of the cheese layer)
This protects your dough from moisture bleeding through from above.
Step 4: The 30-Second Rule
Stretch your dough on a board or peel. Top it. Check it launches freely (shimmy test—move the peel side to side and front to back; the pizza should move with it). Then launch.
The entire process: build to launch should take under 30 seconds. Once toppings hit the dough, that's your timer.
Step 5: Verify Your Stone Temperature
Use an infrared thermometer. Not optional. Your stone should be:
- Minimum: 750°F
- Ideal: 800-850°F
A cold stone won't set the bottom fast enough. Your pizza will sit in moisture too long before crisping. Measure it before every pizza.
Problem #2: Burnt Bottom, Undercooked Top
Your oven has intense floor heat but not enough radiant heat from the dome. The bottom chars in 45 seconds while your cheese is still pale at 90 seconds.
This is usually an oven design issue combined with fire positioning.
How To Fix a Wood Fired Pizza With Burnt Bottom and Undercooked Top
Option 1: Reposition Your Fire
Move your wood and coals off to the side and toward the back of the oven, not directly under the center of the stone. This spreads heat more evenly instead of concentrating it underneath.
Option 2: Use the Two-Stage Cook
This is counterintuitive but works:
- Preheat to 850°F
- Launch your pizza
- Turn the heat down or off completely for 60-90 seconds (this lets the bottom set without charring)
- Bring the heat back up to finish the top
It sounds wrong, but it gives you much better control over the top-to-bottom cooking ratio.
Option 3: Rotate Constantly
Every 20-30 seconds, rotate your pizza. This keeps all sides getting equal exposure and prevents extreme hotspots from burning the bottom.
Option 4: Use a Deflector
If your oven concentrates heat directly on the stone, place a piece of stone, brick, or tile above the fire. This creates an air gap and moderates the intense floor heat.
Problem #3: Uneven Cooking (One Side Burns, Other Side Raw)
Your wood fire isn't evenly distributed. One side of the oven is hotter, so that side of your pizza cooks faster. The opposite side stays undercooked.
How To Fix an Unevenly Cooked Pizza:
1. Constantly Rotate Your Pizza
You MUST rotate your wood fired pizza every 20-30 seconds. Like some home cooks, you can do quarter turns (90 degrees each time). You might also see cooks doing full 180-degree rotations. The point is consistency—every surface gets equal time near the hot spots.
2. Map Your Heat Zones
When the stone is cool, sprinkle semolina flour on it and observe how it toasts. Darker areas = hotter zones. This visual map tells you exactly where to position pizzas and when to rotate them into the hottest areas.
3. Fire Positioning
Keep your coals and wood off to one side, not in the center. This creates a cooler zone opposite the fire where you can position pizzas to start cooking more gently.
4. The Opposite Side Strategy
Place your pizza on the opposite side of the oven from the hottest flames. Once the bottom is set (30-40 seconds), rotate it toward the heat to finish cooking the top.
Problem #4: Your Pizza Won't Launch or The Dough Sticks to the Peel
You've got your pizza ready, the peel is under it, you position yourself in front of the oven... and nothing. It won't slide. You try to shimmy it. Maybe half the toppings fall off. Maybe the whole thing collapses on the stone in a puddle of cheese and embarrassment.
The problem is moisture and timing.

Why Your Pizza Won’t Launch
1. The Peel Sitting Too Long
If you stretch dough, top it, and wait 90+ seconds before launching, the sauce and cheese are already seeping through and creating a seal with the peel.
2. Not Enough Semolina
You've got a light dusting, but not nearly enough. The finer your dusting, the higher your failure rate.
3. Metal Peel Warming
Metal peels heat up when used repeatedly. That warmth draws moisture from the dough, creating sticking.
4. High-Hydration Dough
Dough with lots of water (65%+ hydration) is naturally sticky and prone to adhering to peels.
How to Launch Your Pizza Onto Wood Fire Oven:
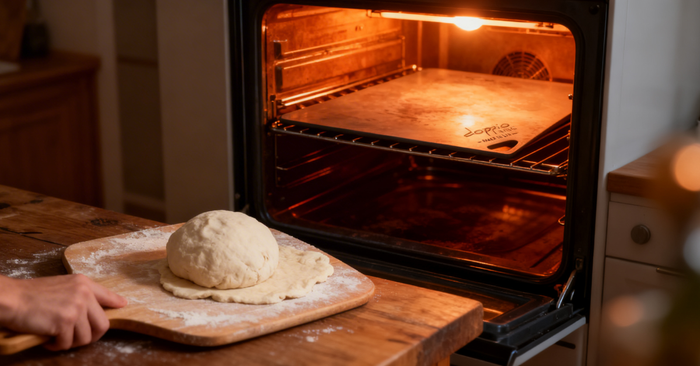
1. Build on a Board, Not the Peel
- Stretch your dough on a lightly floured board
- Top it on the board
- Transfer to the peel just before launching
This cuts your "sitting on peel" time from 60 seconds to maybe 10-15 seconds.
2. Use Semolina Generously
Semolina is coarser than flour and doesn't absorb moisture. Dust your peel heavily—more than you think you need.
3. The Shimmy Test (Non-Negotiable)
Before you launch, push the peel forward/backward, then side to side. Your pizza should move freely. If it sticks:
- Lift the stuck area
- Add more semolina underneath
- Gently blow under the edges to distribute flour
- Re-test
Don't launch until it moves freely.
4. Use the Right Peel
- Wooden peels: Better. They absorb moisture and have more texture.
- Metal peels: Fine, but dust heavily and frequently
- Perforated metal peels: Excellent. Excess flour falls through instead of staying trapped
5. Move Fast
30 seconds from stretching to launch. This is your target. Build efficiently, test, launch.
Problem #5: Toppings Won't Cook (Crust Is Done, Cheese Is Still Pale)
Your pizza crust cooks in 60-90 seconds at 900°F+. Your toppings, especially cheese and fresh vegetables, need more time. But your crust is already charred by the time everything is cooked through.
This is magnified if you've overloaded with toppings.
How To Make Sure The Toppings On Your Wood Fire Pizza Cooks
Pre-Cook Everything
Raw sausage? Cook it first. Mushrooms? Sauté them. Onions? Caramelize them. They finish with residual oven heat, but you're not asking raw ingredients to cook from cold.
Reduce Total Toppings
Three to five ingredients, applied sparingly. This isn't negotiable.
Two-Stage Topping
- Cheese first (moisture barrier for dough below)
- Other toppings second
Adjust Flame Partway Through
Once your crust bottom is set and charred, reduce flame intensity for the final 30-45 seconds. This gives toppings time without further charring the crust.
Problem #6: No Leopard Spotting (Those Beautiful Charred Spots)
That speckled, charred crust pattern is the signature of Neapolitan pizza. It requires very specific conditions:
Cold Fermentation (48-72 hours at 14-18°C)
This is THE factor. Long, cool fermentation builds natural sugars that caramelize and char in the oven. Room-temperature dough doesn't leopard, period.
High Hydration Dough (65-70% water)
More water = bigger air bubbles = more browning surface area.
Hot Oven (400-450°C / 750-850°F)
Lower temperatures won't trigger the browning reactions you need.
Flame Contact
Dough needs to touch active flame or radiant heat from the dome. No flame = no charring.
The Right Flour
Caputo 00 flour (designed for Neapolitan) ferments and browns differently than all-purpose flour.
How to Actually Get Leopard Spots

Plan Ahead
Making pizza Saturday? Start your dough Thursday evening. That 48-72 hour window is non-negotiable.
Cold, Not Room Temperature
Counterintuitively, cold-fermented dough leopards better than warm dough, even though it's harder to stretch.
Get Hot Enough
If you're sitting at 350°C, you're not hot enough. You need 400°C minimum.
Keep Flame Active
Don't let your fire die down to embers. You need flame in the oven while cooking.
Problem #7: Dough Shrinks Back When Stretching
Gluten is elastic. When you pull it, the gluten contracts back. Cold or under-rested dough fights harder because the gluten is tight.
The Solution
Bring to Room Temperature
Don't stretch dough straight from the fridge. Let it sit at room temperature for 2+ hours. Cold dough is contracted gluten.
Rest Between Stretches
Stretch your dough once. You'll notice it just bounces back to its original shape. Give it 10-15 minutes of rest between stretches. During that time, the gluten relaxes, and when you try again, the dough cooperates instead of fighting you.
Use Hand-Stretching
Forget the rolling pin. It compresses dough and squeezes out air bubbles. Hand-stretching (gently pulling over your knuckles, letting gravity help) keeps bubble structure intact.
Longer Bulk Fermentation
24-48 hours at room temperature (or 48-72 cold) makes gluten naturally more relaxed.
Problem #8: White / Underbaked Crust
Your stone is too cool, or you didn't preheat long enough. Browning reactions require minimum temperatures to begin, and proper crust development needs sustained heat.
How To Fix The Underbaked Crust on Your Pizza:
Measure Temperature
IR thermometer. Measure the center, edges, and front-to-back. Target: 750°F minimum.
Preheat Longer
2-3 hours is typical for many wood-fired ovens. One hour isn't enough.
Thin Your Dough
Thick dough takes longer to cook. Neapolitan style (thin crust) cooks much faster than thick-crust pizzas.
Clean Your Dome
Soot buildup reflects heat instead of radiating it downward. Scrape off periodically.
Problem #9: Huge Bubbles / Blisters
Massive air pockets, some burnt on top while the bottom is pale.
What Causes These Bubbles?
- Dough that's fermented too long (excessive CO2 buildup)
- High-water dough in an extremely hot oven (bubbles expand rapidly when exposed to intense heat)
- Cold dough where air pockets aren't distributed evenly
How to Get Rid of Huge Bubbles on Your Wood Fired Pizza
Puncture them gently as you stretch.
When you're working the dough, you'll see big bubbles forming around the rim. Gently poke each one with your finger.
Pizza Docker
This tool makes small holes, creating more even steam escape. Helpful if stretching immediately from cold.
Fermentation Timing
Don't exceed 72 hours cold fermentation. Most doughs peak around 48-60 hours.
Bring to Room Temperature
Cold-fermented dough needs to warm up so bubble distribution is even.
Problem #10: Raw/Doughy Center
Beautiful charred crust and cooked toppings, but the center is underbaked, dense, and gummy.
Why Does Your Wood Fire Pizza Have a Raw Center?
- Under-fermented dough (insufficient crumb structure)
- Mismatch between hydration and oven temperature
- Dough too thick
How To Get Rid of That Raw or Doughy Center of Your Wood Fired Pizza:
Proper Fermentation
24-48 hours minimum room temperature, or 48-72 hours cold. This builds open crumb structure that cooks through quickly.
Thin Your Dough
Aim for 1/4-inch thickness for Neapolitan style. Cooks in 60-90 seconds.
Verify Temperature
At 700°F, everything takes longer and outsides burn before insides cook. You need 850°F+.
Problem #11: Creosote / Bitter Sooty Taste
Wood quality. You're using wet, green, or softwood (pine, fir). These produce creosote—an incomplete combustion byproduct.

How To Get Rid of That Bitter Sooty Taste of Your Wood Fired Pizza:
Hardwood Only
Oak, maple, hickory, fruit woods (apple, cherry). Never softwoods.
Seasoned (12+ Months)
Moisture content below 20%, ideally 15%.
Watch Your Smoke
Good combustion = thin blue smoke. Bad combustion = white billowing smoke. White = wet wood or oxygen starvation.
The Smell Test
Good wood smells pleasant. Creosote smells chemical and bitter.
Problem #12: Temperature Won't Hold
You hit 850°F, made one great pizza, then by pizza #5 you're at 600°F.
Why The Head Keeps Dropping on Your Wood Fire Oven:
- Large oven opening (heat loss)
- Wet oven (moisture absorbing heat)
- Poor wood quality (burning fast without consistent coals)
- Inadequate insulation (heat loss to environment)
How to Maintain The Temperature:
Use a Door
Or reduce opening size with bricks. Even partial closure helps tremendously.
Manage Your Fire
Bank coals into a bed rather than active flame. One log every 5-7 minutes, added to the side, not center.
Use Quality Hardwood
Larger diameter, well-seasoned logs. Split wood burns hotter than round.
Dry Out Damp Ovens
Run curing fires to drive out moisture. This might take a few days.
Check Insulation
Failing insulation means heat loss. Might need rebuilding.
The Most Important Fix To Avoid These Wood Fired Pizza Problems? SPEED
Here's what we've learned that nobody emphasizes enough: the fastest cooks make the best wood fired pizzas.
This isn't about rushing. It's about efficiency:
- All ingredients prepped before firing the oven
- Pizza built in 15-20 seconds
- Launch within 30 seconds of building
- Rotate every 25-30 seconds
- Remove at the exact right moment
The longer your pizza sits (on the peel, under-prepared, between rotations), the more problems develop. Moisture soaks in. Temperature drops. Uneven cooking happens.
Set up your prep station perfectly. Preheat your oven fully. Then move fast.
Why Choosing The Best Wood Fire Oven Matters on Avoiding These Problems
Let's be honest: some issues can't be fixed with technique alone. They're oven design problems.
The Problems You’ll Face When Choosing Compact Ovens
Small portable ovens (under 20 inches) concentrate heat intensely on the floor while the ceiling stays relatively cool. This makes it nearly impossible to get balanced cooking.
Solutions:
- Two-stage cook (high heat initially, then reduce)
- Deflector stones above the fire
- Pizza screens to create air gaps
- Accept that rotations need to be more frequent
When to Consider a Better Oven

After running thousands of pizzas through different setups, we can tell you honestly: a well-designed oven removes an entire category of problems.
When we moved and needed a new oven, we realized that:
Insulation matters more than people think. A properly insulated oven maintains temperature across multiple pizzas. A poorly insulated oven drops 100°F per pizza.
Stone design affects heat distribution. Dual Cordierite stones (one on bottom, one on top) create balanced radiant heat from above and below. This solves the "burnt bottom, pale top" problem automatically.
Size affects control. A mid-sized oven (20-24 inches) gives you room to work while maintaining heat concentration. Oversized ovens lose heat. Tiny ovens concentrate it too much.
A quality oven doesn't solve all your problems—technique still matters enormously—but it removes the variables that make learning impossible. You're not fighting equipment. You're learning pizza.
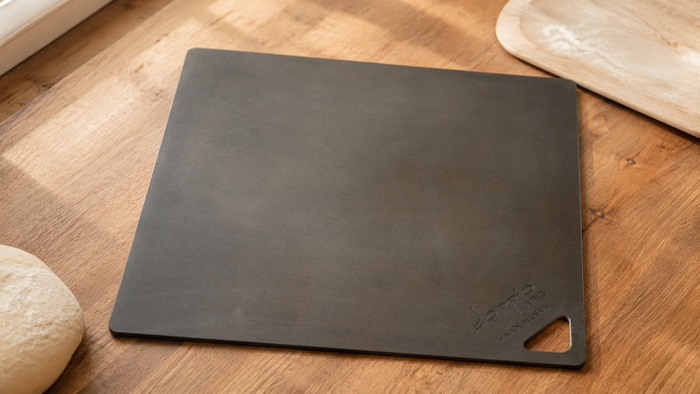
If you want a wood fire pizza that’s not soggy, that doesn’t have blisters, that cooks evenly, and won’t taste like soot, buy your wood fire oven from Doppio Living.
FAQs
How Hot Does My Wood-Fired Oven Really Need to Be?
Your wood-fired oven temperature should reach a minimum of 750°F for the stone, ideally 850°F+ for Neapolitan style. Lower oven temperatures work but cook much slower and produce less crust browning. This is the single most impactful measurement you can make—use an IR thermometer and don't guess.
Why Is My Second Wood-Fired Oven Pizza Worse Than My First?
Your second wood-fired oven pizza is worse than your first because of temperature recovery between pizzas. Your second and third pizzas cook in a slightly cooler oven than the first. You have two solutions: wait 5-10 minutes between pizzas to allow the oven to fully recover, or use a smaller, well-insulated oven that holds temperature better and recovers faster between cooking cycles.
Is Wet Wood Ever Okay to Burn in a Wood-Fired Pizza Oven?
Wet wood is never okay to burn in a wood-fired pizza oven. Never. Wet or damp wood produces creosote and sooty taste that ruins your pizza. Use only fully seasoned hardwood (12+ months seasoning) with moisture content below 20%. Green wood and wet wood are the #1 reason people complain about bitter, chemical-tasting pizza.
What's the Best Wood Type for a Wood-Fired Pizza Oven?
The best wood type for a wood-fired pizza oven is seasoned hardwood like oak, maple, hickory, or fruit woods (apple, cherry). If you use the right wood in your wood-fired pizza oven, you'll avoid softwoods (pine, fir) entirely—they produce excessive smoke and creosote that makes pizza taste chemical and bitter. Your hardwood should be fully seasoned (12+ months) with moisture content below 20%.